Connect your SLB to the gControl Panel using an Ethernet cable
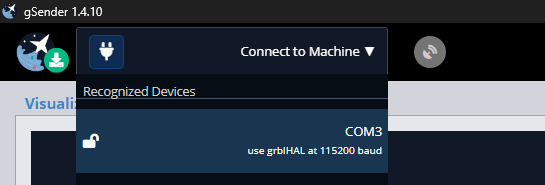
First, connect the USB/USB-C cable from your gControl to the SLB and on gSender connect to the machine as shown below:

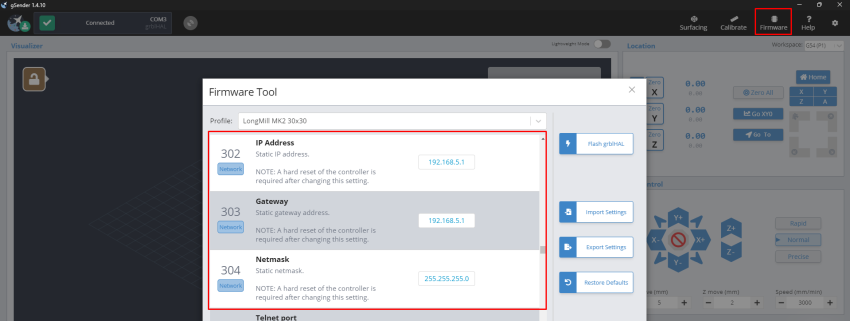
Go to Firmware and scroll down to find the 302, 303 and 304 options. By default, they should have these values:
302 (IP Address): 192.168.5.1
303 (Gateway): 192.168.5.1
304 (Netmask): 255.255.255.0
After confirming, unplug the USB and connect the Ethernet cable from your gControl to the board. You should see a green light on and a yellow light blinking at the SLB port.
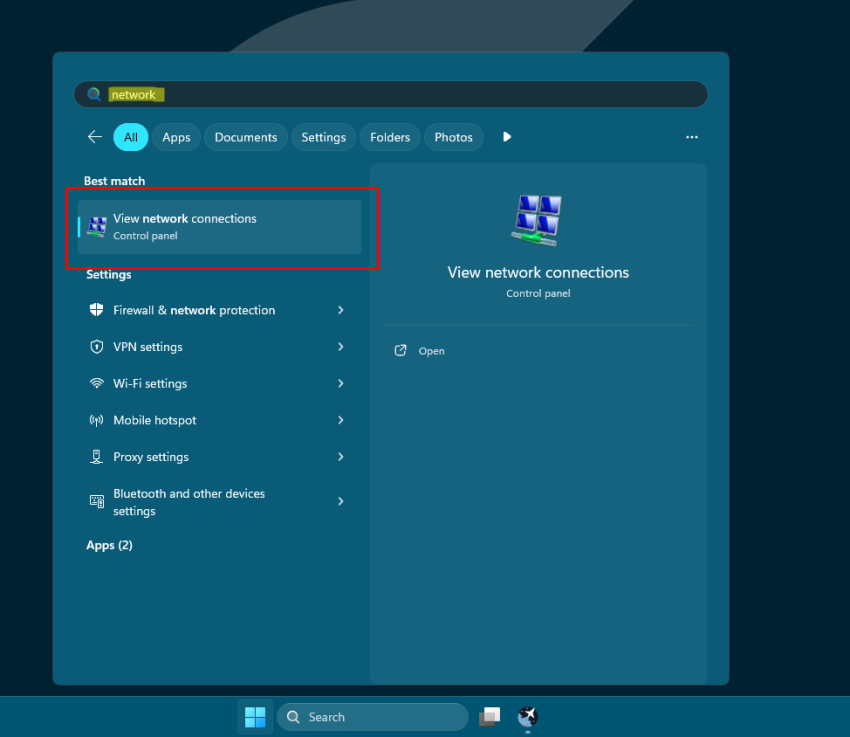
Now, on your gControl computer, find the Network Connections. If you write “network” in your search bar, a “View network connections” will appear; click on it.
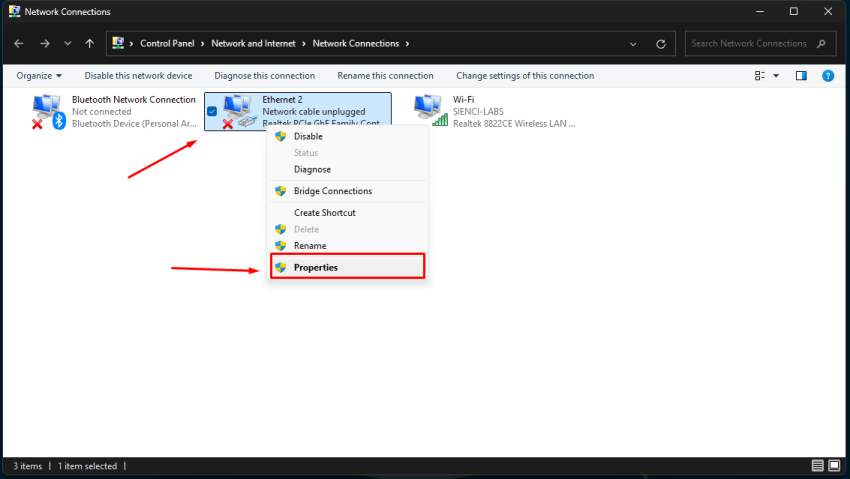
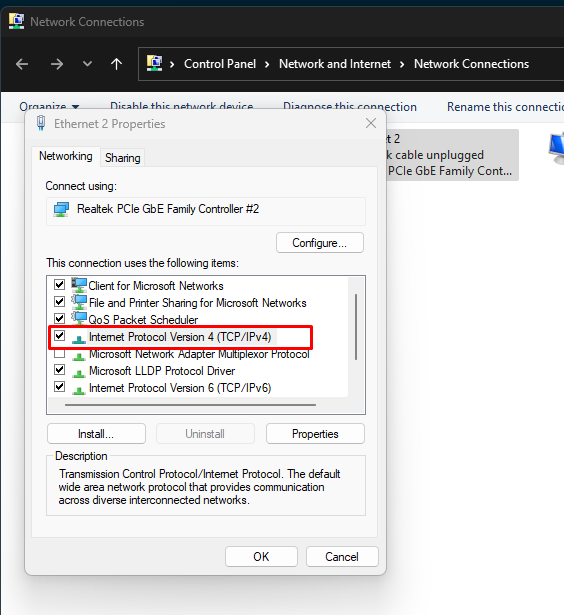
In Network Connections, right-click on “Ethernet 2” and click on Properties.
Double-click on Internet Protocol Version 4 (TCP/IPv4)
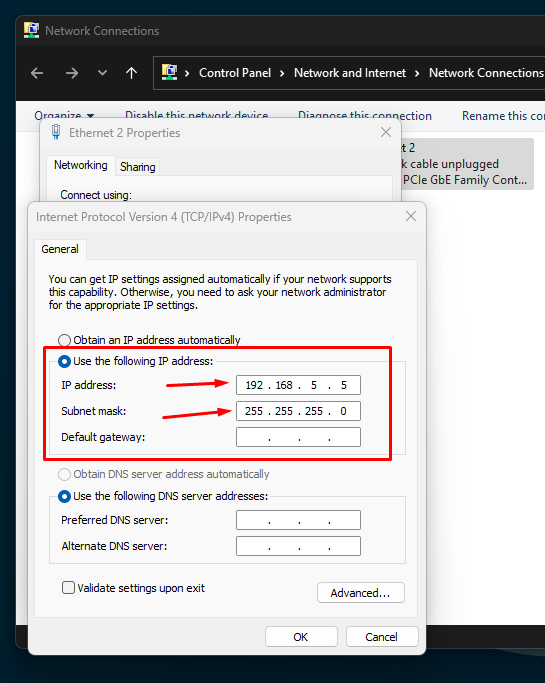
Select the option “Use the following IP address:” and fill in the fields IP address and Subnet mask as shown.
** You can assign any IPs from 192.168.5.2 to 192.168.5.254. I chose 192.168.5.5 for this tutorial.
Make sure this information matches and you enter the correct subnet mask. Click OK after that.
Probably after this configuration, your Ethernet 2 should be showing it:

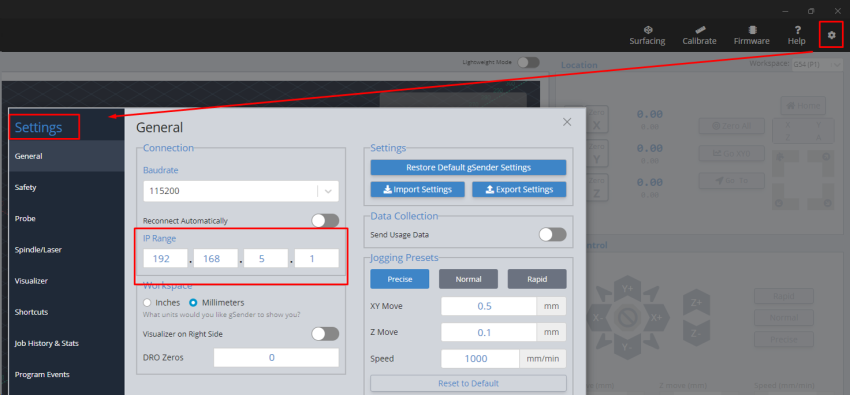
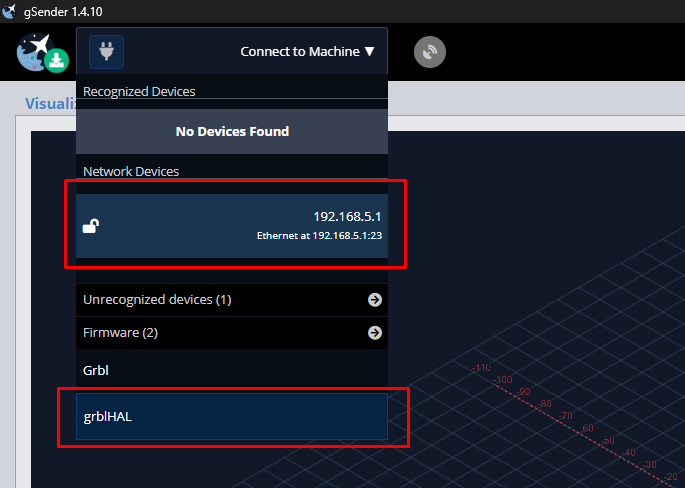
In gSender’s general settings, ensure the IP range matches the EEPROM IP.
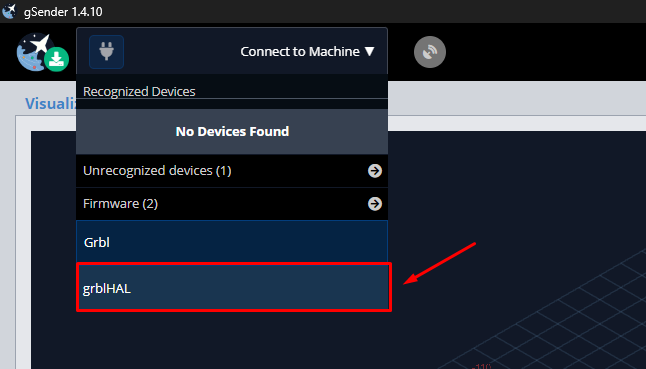
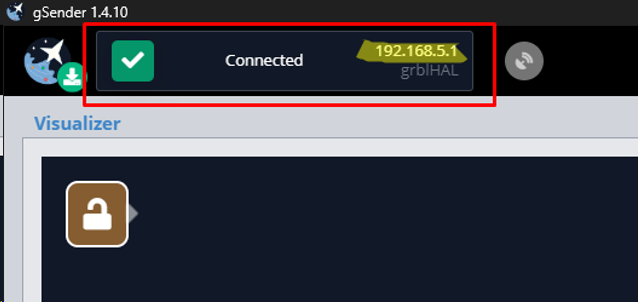
With grblHAL firmware selected, choose Network Devices and confirm it connects successfully.
If you have a Mac, make sure you use a USB C to Ethernet adapter for your Ethernet cable. Do not use a flat USB C to Ethernet cable.
#gcontrol ethernet, #gcontrol USB