This resource will cover connecting to the SuperLongBoard or the SLB-EXT via Ethernet connection using gSender 1.5.0 and newer above.
First, connect the USB/USB-C cable from your gControl to the SLB. If you have a Mac, make sure you use a USB C to Ethernet adapter for your Ethernet cable since most Macs don’t have an Ethernet port. Do not use a flat USB C to Ethernet cable.
Then on gSender connect to the machine as shown below.
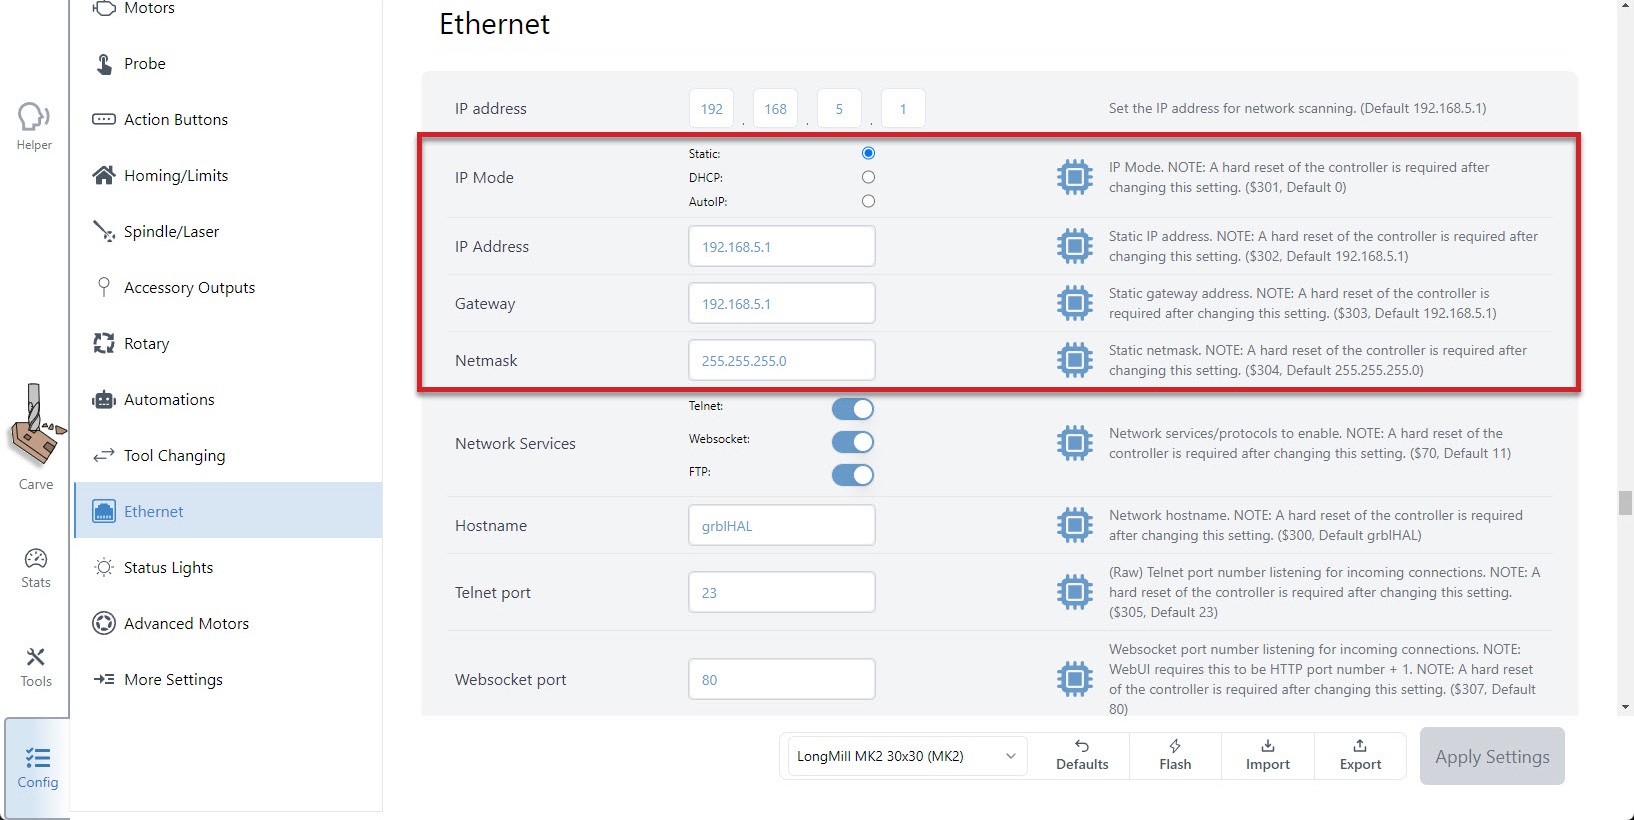
Go to Config and click the Ethernet button in the left column. Scroll down to find the following
Make sure the IP mode is set to Static.
Note down the following values, which will be needed in the section for making changes to your Windows Ethernet settings.
(IP Address):
(Gateway):
(Netmask):
Once confirmed, you can unplug your USB and connect the Ethernet cable directly from your PC to your board. If you look where you plugged the Ethernet cable into the SLBs port from the outside, you should see a green light on and a flickering yellow light.
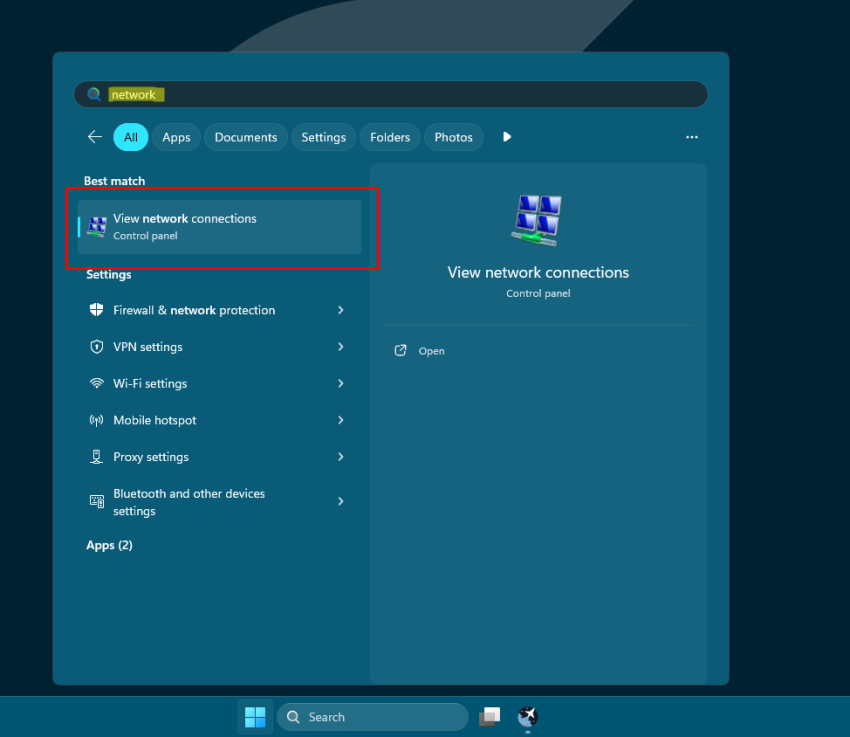
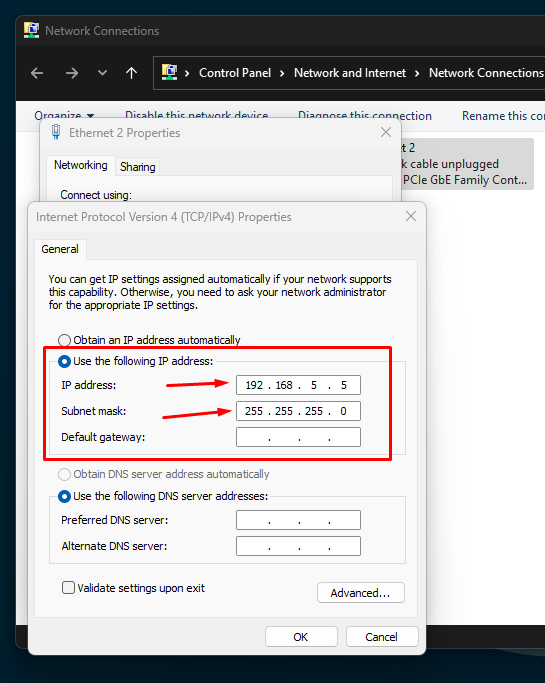
You’ll need to configure the PC’s Ethernet interface. On the computer that is connected to the controller, find the Network Connections. If you type “network” in your search bar, a “View network connections” will appear; click on it.
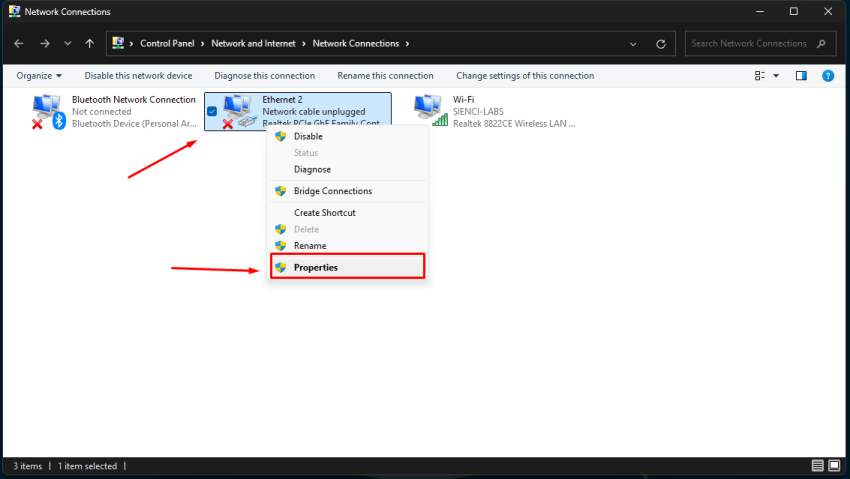
In Network Connections, right-click on “Ethernet 2” and click on Properties. Please be sure to use the correct ethernet connection if you have more than one connection.
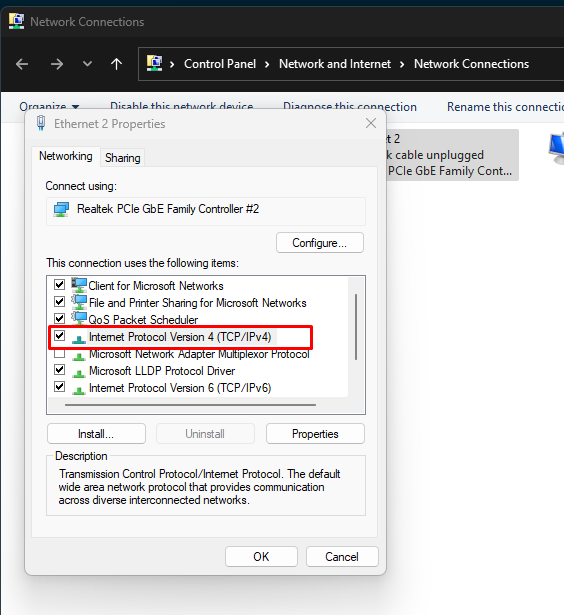
Double-click on Internet Protocol Version 4 (TCP/IPv4)
Select the option “Use the following IP address:” and fill in the fields IP address and Subnet mask as shown.
** You can assign any IPs from 192.168.5.2 to 192.168.5.254. I chose 192.168.5.5 for this tutorial.
Make sure this information matches and you enter the correct subnet mask. Click OK after that.
Probably after this configuration, your Ethernet 2 should be showing it:

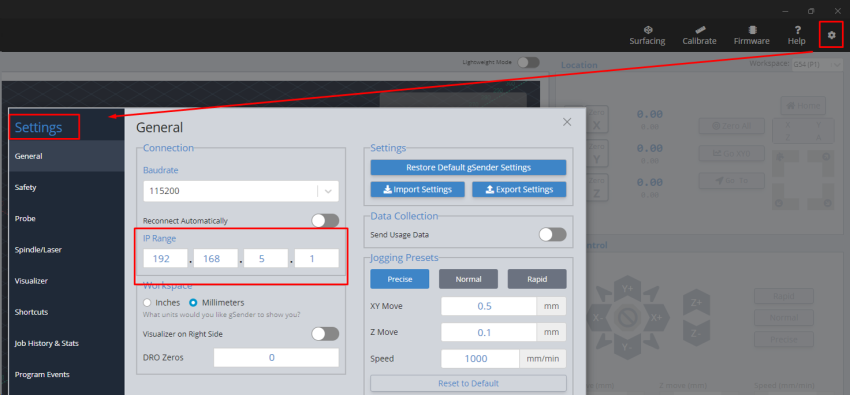
In gSender’s general settings, ensure the IP range matches the EEPROM IP.
Next reconnect to gSender, the Ethernet port should match the IP address you noted earlier. Click the address and you should connect.