Common Alarms and Errors on the SLB / SLB-EXT
- Alarm 1: this indicates the machine has hit a hard limit, meaning the limit switch was triggered. Either clear the alarm and jog away from the limit switch, or turn off the machine and push the gantry away from the limit switch. If you can't clear the alarm, turn off the machine and rotate the ballscrew to move the machine.
-
Alarm 10 on startup: you should be able to “Click to Unlock Machine” in gSender. If this doesn’t work, you can try to:
- Turn ON the board, the big status LED and smaller "Halt" light should be RED
- Rotate to release the E-stop, this should turn the smaller “Halt” light off.
- Click the Unlock button in gSender.
- If your machine doesn’t change to ‘Idle’ on gSender, and the status light does not turn WHITE, turn the board off and on again, repeating this process until it goes through
- Turn ON the board, the big status LED and smaller "Halt" light should be RED
- Alarm 10 when E-stop not pressed: Check if you have any loose wires or have conductive material in contact with the underside circuitry of the E-stop unit, any of these cases could be causing it to trigger unexpectedly. Otherwise, the E-stop or controller itself could be faulty. See Alarm 10 Warning - E-stop Troubleshooting
-
Alarm 10 when motor alarms are also triggered: This means that the closed loop stepper motors are experiencing mechanical resistance, or the motor wiring is incorrect. See
Alarm 10 Warning - Motor Troubleshooting - Alarm 14 unexpectedly or during spindle setup: this would point to an error in how you’ve set up your spindle, wiring, EEPROM values, or the PD values on your VFD. Ensure that the spindle is plugged in before you turn on the controller. Then double-check spindle setup instructions, since even a single incorrect parameter will prevent communication between the controller and the spindle. See Alarm 14 Troubleshooting
-
Alarm 15 during Y-axis or XYZ homing: this could be either improper wiring or the machine being out of square.
-
Make sure that the Y-axis motor and sensor cables are connected properly as pairs. The Y1 sensor cable must be attached to the white connector above the black Y1 motor connector, the same applies for Y2.
- Jog the machine to the rear bump stops of the machine, so that the right and left Y-axes are at the same Y position. Then check that the sensors on the left and right Y-axis are sticking out the same amount from their respective end plates. Re-home and see if you still get the alarm.
-
- Error 1 during Homing: make sure $39 is turned on.
-
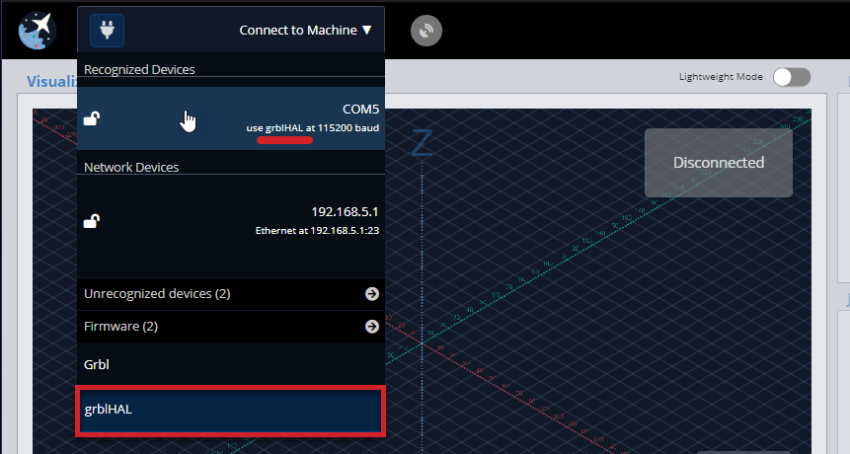
Error 2: Assuming your machine uses a SLB / SLB-EXT, ensure that you are connecting using grblHAL. For those using LongBoards, connect with grbl.

- Error 8 or 9 after hitting E-stop: the typical routine after hitting the E-stop will be to first ‘reset’ the board and then ‘unlock’ it, you’ll get either of these errors if a step in this process is missed
- Error 10 when changing firmware settings: This occurs when you are turning on a setting that first requires homing ($22). Home before proceeding.
- Error 24: check that you are not loading up a regular file while in Laser mode
-
Error 1, 2, 20, 24, 26, 28 that cannot be resolved from above solutions:
- Check that you are using the correct post-processor
- Use gSender to check for errors in the g-code using Verify Job feature
- Ensure your connection to the machine is reliable. See if USB cable is loose, try a new USB cable, move to another USB port, run the job in the air to determine if it is a static issue, use ethernet connection instead.
- Error 33: Use a mm post-processor instead of an inch post-processor. This will provide enough decimal places to satisfy arc curve calculations and should eliminate the error.